How to Fix PS5 HDMI Port
Is your PS5 not connecting to a TV, or showing a distorted image on the TV? These are classic signs that something might be wrong with your PS5’s HDMI port. Having a working HDMI port is necessary to be able to use and enjoy your console, so it’s important to get it fixed as soon as possible. Thankfully, we at TronicsFix are here to help!
Here we will explain in detail how to fix an HDMI port on the PS5. If you are looking for help on the PS4, take a look at this post on how to fix a PS4 HDMI port instead.

PS5 Faulty HDMI Port Symptoms
Here are some common symptoms that might occur if your PS5 is having HDMI port issues. Even if you aren’t having these issues right now, it would be good to take note to look out for these in the future:
- Your TV is saying “No Signal” while the PS5 is turned on and plugged in
- The displayed image from your PS5 is distorted or pixelated
- The audio from your PS5 is distorted or doesn’t sound right
- Your HDMI cord won’t plug all the way into your PS5
- Your PS5’s HDMI port is loose or has bent or broken pins inside
PS5 Faulty HDMI Causes
There are a couple of different reasons why your HDMI system might not be working. Here are the least common and the most common causes to this issue:
Least Common Causes
- Your PS5’s HDMI chip on the motherboard is faulty
- Your PS5 has a software issue
- Your PS5 has water damage
- Your TV’s HDMI port is faulty
- Your HDMI cord itself is faulty
- Your device experienced a lightning strike or power surge recently
Most Common Causes
- Your PS5 was dropped or fell over while the HDMI cord was plugged in
- The HDMI cord was pushed too forcefully into the HDMI port
- The HDMI port in your PS5 is clogged with dust or dirt, or has foreign objects inside of it
Easy DIY Fixes To Try
It’s worth mentioning that before trying any of these fixes, you should check whether you have the correct HDMI cable for your PS5. The wrong type of HDMI cable can cause issues with displaying the image properly on the TV, so it’s recommended to use the HDMI cable that came with the system, the HDMI 2.1 cable.
Below you will find a list of easy fixes you can try before resorting to trying PS5 HDMI repair. Replacing the HDMI port is much more complicated than these easy fixes, so doing these first can save you some money and hassle.
1. Power Cycle Your PS5
The first thing you will want to try is power cycling your PS5. This can help a number of performance issues. To do this, hold down the power button on your PS5 until you hear it beep twice, indicating that it has completely turned off. Once turned off, unplug the power cable and let the PS5 sit for 5 minutes. After 5 minutes have passed, try plugging it in and turning it on again.
2. Select the Correct TV HDMI Input
This is a common mistake when trying to connect a console to the TV. Using your TV remote, check to make sure that your TV is on the right HDMI input. If the wrong input is selected, your PS5 won’t be able to display an image on the TV. You can also try using a different HDMI input, as sometimes one input may not be working while another one works fine.

3. Check Both Ends of the HDMI Cable
First, check the outside of your HDMI cable to see if there are any rips or tears. Damage on the outside can damage the inside as well, so if you see rips or tears you might want to try using a new cable. Also, if there is dirt or debris inside either end of your cable you can use a toothbrush and isopropyl alcohol (the higher concentration the better) to clean the electrical components on both ends. A clean HDMI cord will work much better than a dirty one!
After inspecting your cable, try plugging it in again, making sure that the HDMI cable is completely plugged in on both the PS5 and the TV. If the cable is loose on either end it might not be able to display the image properly on the TV. Also make sure that you are using the correct HDMI cable for your PS5. It is generally recommended to use the cable that came with your console, the HDMI 2.1 cable. If you need a new HDMI 2.1 cable here's one we recommend from Amazon (paid link): Anker HDMI Cable.
4. Boot Your PS5 Into Safe Mode
You may be able to fix the problem by booting your PS5 into safe mode and changing the video output. Keep in mind that this might not work if your PS5 isn’t able to display an image at all.
To go into safe mode, hold down the power button until your PS5 is completely turned off. Then, press and hold down the power button again for about 7 seconds until you hear two short beeps. After the beeps, let go of the power button, and connect a controller using a USB cable. Press the PS button on the controller and you should see the safe mode screen pop up.
From safe mode, select option 2, “Change Video Output”. From there, set the HDCP mode to “HDCP 1.4 only”. Afterwards, restart the console and see if your PS5 is now able to properly display onto the TV.
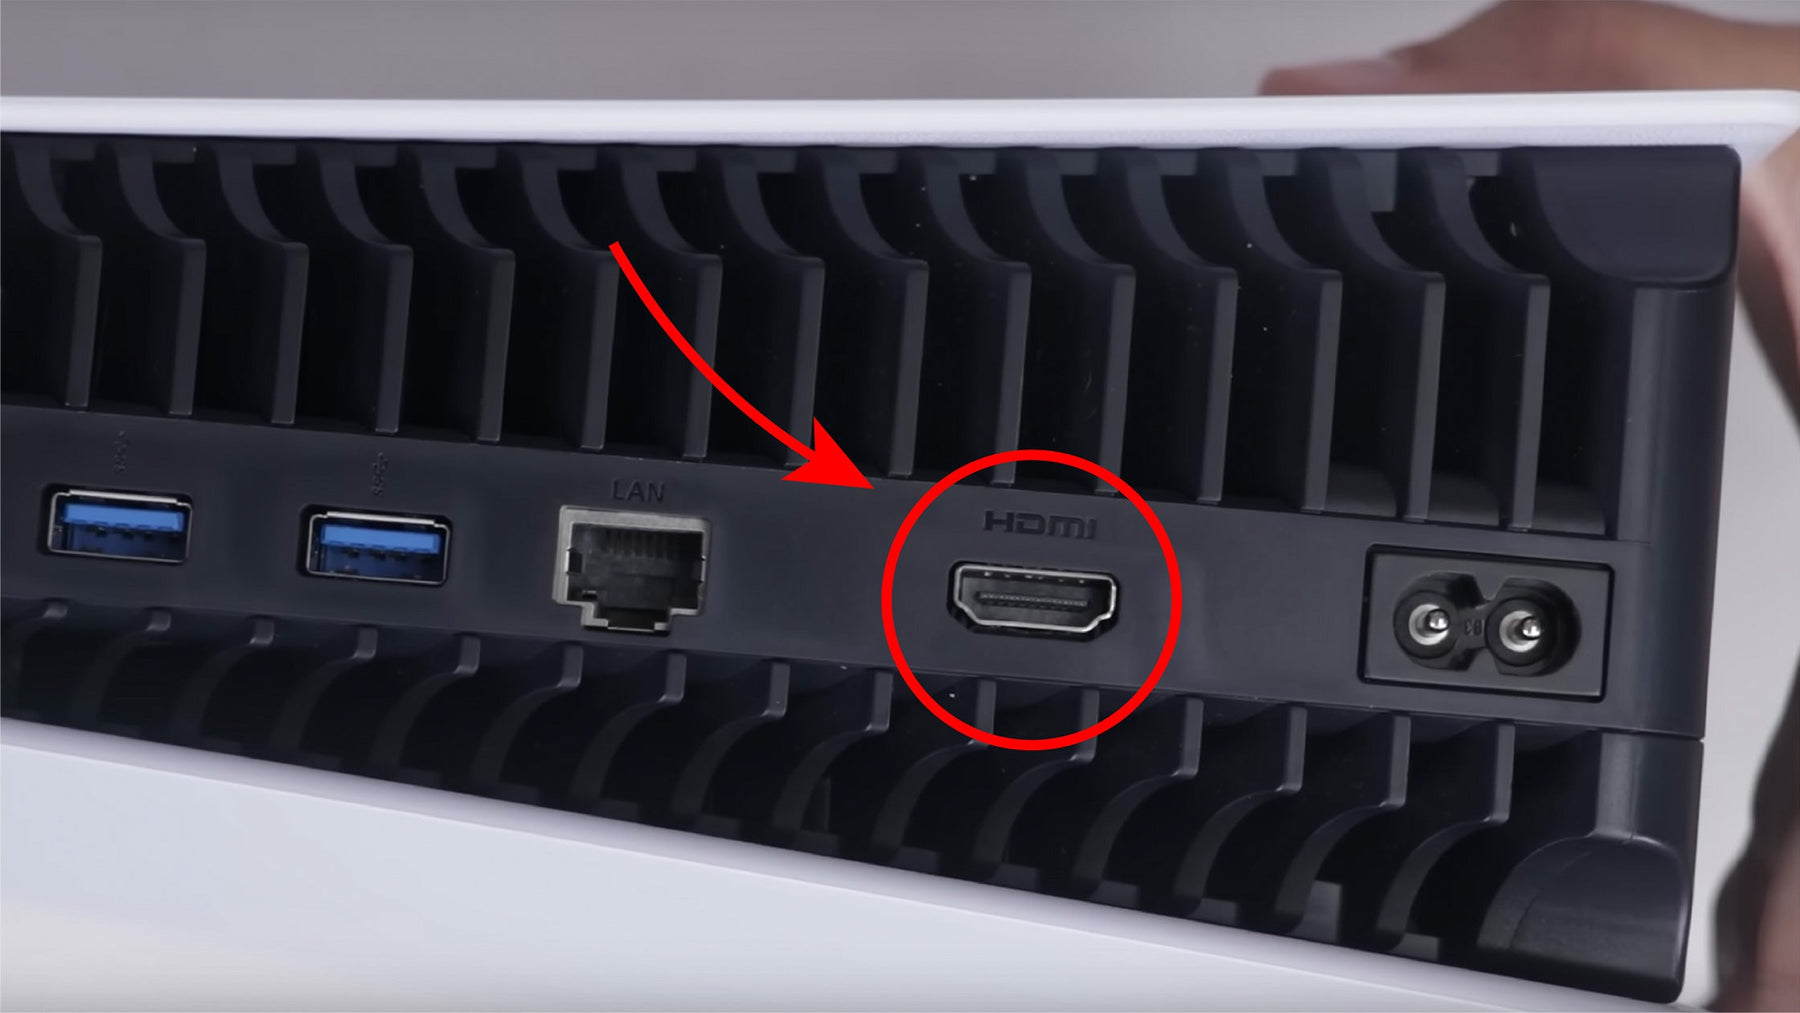
5. Look Inside the PS5’s HDMI Port
If nothing has fixed the problem so far, try looking inside of the HDMI port on the PS5. You will want to look for dust, dirt, or foreign objects clogging the port, as well as bent or broken pins. If there is anything clogging the port, try removing it carefully while the console is completely turned off and unplugged. Try turning the console on again afterwards.
If you see bent or broken pins, the fix will be a bit more complex. Continue on to the next section where we will discuss how to replace a broken PS5 HDMI port.
How to Replace a Broken PS5 HDMI Port
Unfortunately, the only good way to permanently fix a broken HDMI port is to replace it. This requires a fair amount of soldering skills and soldering equipment that can be quite expensive. If you aren’t confident that you could safely replace your console’s HDMI port you might want to send it in to get repaired by an expert, like ShaneFix.com. That way you can sit back and relax knowing that your console is in good hands.
For those who would like to try doing this repair process themselves, here are the steps you would need to take to do so:
- Prepare your new HDMI port by filing down the two outermost mounting pins with a metal file to create a textured surface for the solder to adhere to.
- Apply a small amount of soldering flux to the mounting pins on the HDMI port. Then, using your soldering iron, attach a small amount of solder to the 19 small pins, both on the inside and outside.
- Shifting focus to the motherboard, use your hot air soldering station to heat up the mounting pins on the old HDMI port.
- Make sure to let the solder liquefy completely, and then carefully take the old HDMI port off of the motherboard. You will want to make sure that the solder has liquefied because if you don’t, you might accidentally pull up the pads on the motherboard too, which would be a much more difficult fix. After you have taken the old HDMI port off, keep your hot air soldering tool over the motherboard and put a very small amount of solder to the areas on the board where the mounting pins go through.
- Turn the motherboard over and apply a little bit of flux to the 19 small pins that are attached to the motherboard. Then, apply a tiny bit of new solder to each of the pins (a microscope may be necessary for this step).
- Flip the motherboard back over, and using your hot air soldering tool heat up the area where the old HDMI port went, making sure that the solder liquefies completely again. Then, using a pair of metal tweezers, push the new HDMI port up into the motherboard. Make sure to put enough pressure on the HDMI port to ensure it is attached securely, and then continue to put pressure until the solder has solidified.
- Looking at the back of the motherboard again, make sure that each of the 19 small mounting pins are securely attached by poking them with a metal pick.
- Let the motherboard cool down for about 1-2 minutes until it is no longer hot to the touch. Then, slowly and carefully place a very small amount of flux on the 19 mounting pins. Make sure not to bridge any of the gaps between the pins, or else the HDMI port might not work correctly.
- Wipe up any leftover flux, and then check each pin again with the metal pick to make sure all of them are attached securely to the motherboard.

Additional Help
TronicsFix is no longer offering a repair service, but one of our former repair techs started a business that we highly recommend. Check out the ShaneFix website for PS5 repairs, as well as other console repairs. There’s no need to buy a whole new PS5 when you can save some money and ShaneFix can fix it, quick!
Another great source of information is the TronicsFix forum where you can find all sorts of posts about PS5’s and solutions to problems, including information on PS5 HDMI repair.
About the Author
 Kirstyn Bahnmiller is a writer, graphic designer, and video editor for TronicsFix who loves to share her ideas and creativity with the world. In her off time you will find her working on various crafts, making digital art, taking photos, and cooking delicious recipes she found online.