
Nintendo Switch LCD Screen Replacement
In the world of handheld video game consoles, there’s almost nothing more important than the screen. So we're discussing common Switch LCD problems including what to do if you need to replace your screen.
Nintendo Switch LCD Problems
Here are some of the most common problems that happen to the Nintendo Switch’s screen and how to avoid them to keep your screen in good shape so you don't need to replace it.
- Dock causing scratches and scuffs: When the Switch is haphazardly placed into the dock it is possible that the system’s screen can be scratched by the hard plastic edges. If you find yourself frequently switching the console between handheld and docked positions, it is strongly advised that you use a screen protector or attach microfiber clothes to the offending hard plastic parts.
- Screen scratches or cracks: Have you ever had your heart sink and time slow down when you drop your favorite electronic device? If you drop your Switch and the screen cracks, the first thing to do is to diagnose what is broken. If the image beneath your screen is still okay then you just need a new digitizer. If the image is also acting strange then you’re most likely going to need a new LCD as well.
- Dead Pixels: Dead pixels are imperfections on a screen caused by pixels that don’t light up anymore. LCD screens have been known to have these and they are most noticeable on a handheld gaming system like the Switch. Nintendo has stated that they know about the problem but that it is not covered by their warranty as dead pixels are “characteristic of LCD screens.” These screen defects however, are some of the most annoying, immersion-breaking issues in handheld gaming and it is crazy that Nintendo has denied fixing them.
Replacing the LCD Screen
(Scroll to the bottom for a DIY how-to video) If you are electronically savvy and feel like you want a general outline of the process of repairing your own Switch by replacing the screen we'll cover it here. However, replacing a Switch screen is a difficult repair so we don't recommend attempting it unless you feel confident you can do it without causing additional damage.
If you still are interested, the first thing you’ll need is a collection of tools including:
- Basic Toolkit including Tri-Wing and Philips Screwdrivers, Sturdy Tweezers, and a Scalpel/Utility Knife
- Hot Air Gun or iFixIt iOpener or Silicon Heating Platform
- Plastic Screen Removal Tool Kit
- Double Sided Tape
- Screen Cleaner
- Compressed Air Canister
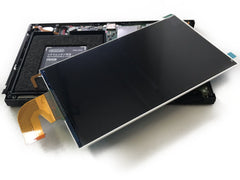
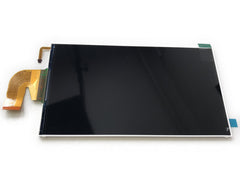
- Nintendo Switch Digitizer/LCD Screens
(You can buy these tools from our TronicsFix Amazon Store here.)
The second thing is to get your Switch apart by removing all of the screws holding your Switch together. Next remove the back of the console. Then you’ll find a large piece of aluminum shielding which will require more screw removal. Next, disconnect the memory card slot circuit board and remove the shield.
Now you can see the motherboard and it's important to immediately disconnect the battery before you do anything else. A few more components need to be disconnected and removed and then you can move onto the removal of the digitizer.
The digitizer is held onto the Switch with adhesive which needs to be softened with either an iFixIt iOpener, a silicon heating platform, or a hot air gun. When the screen is warmed up, you can take the digitizer off of the frame with a variety of pry tools, being careful to avoid the digitizer ribbon cable underneath the right side of the screen. You’ll then need to clean off the adhesive and either put on a new digitizer or if your LCD is also broken, you’ll need to remove the LCD and replace it with a new one, as well.
Once your digitizer and/or LCD are replaced, it’s just a matter of reassembling the console and it should be good to go!
If this sounds like something you'd like to try, we recommend using the iFixit Nintendo Switch LCD Replacment Guide to guide you through the process. You can also check out the video below to see what the process looks like.
Nintendo Switch DIY Screen Repair Video