
5 Tips for Soldering Electronics (for Complete Beginners)
Soldering is an essential skill for anyone interested in working with electronics - whether you want to build your own circuits, repair devices, or embark on DIY projects. There are many great tutorials online that can tell you how to solder, but some can be lengthy and difficult to understand. Here we will walk you through the basics of soldering electronics, making it accessible and easy to understand, even if you've never held a soldering iron before.
Once you understand the basics of soldering, we'll share with you our Top 5 Beginner Soldering Tips. (Click the link if you're ready for our 5 tips now!)

Soldering Basics
Before we get into the specifics of soldering electronics, here are some of the basics you should know:
What Soldering Is
Soldering is a process that involves melting a low-melting-point metal alloy, known as solder, and using it to join two or more electrical components (or non-electrical components) together. The solder forms a solid electrical and mechanical connection, allowing current to flow between the components.
Different Types of Solder
There are two main types of solder used for electrical soldering: lead-based solder and lead-free solder.
Lead-based solder, typically composed of 60% tin and 40% lead (60/40), is easy to work with and has a lower melting point, but is warned against because of its health risks. If you do choose to use lead-based solder, make sure to wash your hands well after working with it, and use proper PPE (personal protective equipment) to protect yourself.
Lead-free solder, on the other hand, contains no lead and is more commonly recommended because of environmental and health concerns. It generally requires higher temperatures and can be slightly trickier to use effectively.
Different Types of Soldering
When it comes to electrical soldering, there are two main types: through-hole soldering and surface-mount soldering.
Through-hole soldering involves soldering electrical components with wire leads that pass through holes in a PCB (printed circuit board). This is generally easier than surface-mount soldering because the components are bigger and it doesn’t need to be as precise. Some examples of electrical components that need to be through-hole soldered onto a PCB are resistors, capacitors, diodes, transistors, IC’s (integrated circuits), connectors, and electromechanical components.

Surface-mount soldering is when you solder smaller electrical components onto pads on a circuit board. Because the electrical components are often small, it is considered to be more difficult because of the precision you need to make a good, clean solder connection. Some examples of electrical components that need to be surface-mount soldered onto a PCB are connectors (USB, HDMI, micro USB), LED’s, microcontrollers, passive components (inductors, ferrite beads, thermistors), and various other SMD’s (surface-mount devices).

Safety Considerations Before You Begin
Soldering involves working with high temperatures and potentially harmful fumes, so it's important to observe safety precautions to protect yourself and your workspace. Seriously consider these safety precautions before attempting to solder:
Personal Protective Equipment (PPE): It’s important to use proper PPE whenever doing an activity that involves potentially dangerous equipment or tools. Because soldering involves things like molten metal and harmful fumes, there are a couple of different types of PPE that you should consider. For example, safety glasses can protect your eyes in case of splatters, heat resistant gloves can protect your hands in case you touch a hot tool accidentally, and a respirator mask or a fume extractor can help protect against harmful fumes.
Ventilation: Make sure to work in a well ventilated area when working with solder. You’ll also want to use either a respirator mask or a fume extractor.
Fire Safety: Before working on a project, look around your work space to make sure there are no flammable objects. That could include loose paper, chemicals, solvents, or anything that could catch fire if it came in contact with the hot soldering iron or solder. Keep a fire extinguisher or fire blanket near your work space in case of emergencies.
Handling Solder: Keep in mind that you should never touch the molten solder directly. Let the solder, as well as any objects it is attached to, completely cool down before attempting to touch it. If you need to move it before it has cooled down, use metal pliers or something similar that can handle high temperatures.
Lead Safety: If you use lead-based solder, wash your hands thoroughly after soldering and before eating or drinking. Avoid touching your face while working with lead-based solder and use a fume extractor or respirator to avoid breathing in the fumes. Lead is known to be toxic and can cause many serious health issues if not handled correctly.
Tools and Equipment To Get You Started
These are the most essential tools you will need to get started with soldering (including links to some products on Amazon). Please note: As an Amazon Influencer, I earn from qualifying purchases.

Soldering Iron: This will be the main tool you will need for melting solder. Soldering irons come in many variations, but it is generally recommended to choose a soldering iron with an adjustable temperature control for versatility. Some projects will require lower temperatures while others may require higher temperatures. It is also recommended to have a Soldering Iron Stand to place your soldering iron onto when it’s hot. If you want a more compact option, you can get something called a Soldering Station that includes both an iron and a stand as well as some other helpful tools.
- Here's a link for a cheap soldering iron kit to get you started, available on Amazon (paid link): Plusivo Soldering Iron Kit
- Here's a link for a good quality soldering station with a stand, available on Amazon (paid link): Hakko Soldering Station
Solder: Solder is the metal alloy used to create connections. The two most common types for electronics include a lead solder of about 60/40 tin/lead, or a lead-free solder that is usually made of tin, silver, and copper. Before buying solder, ensure the diameter of the solder wire is appropriate for your work. The solder that we have linked works great for working with small electronics.
- Here's a good lead-based solder you can buy on Amazon (paid link): Kester 44 Solder Wire
- Here's a good lead-free solder you can buy on Amazon (paid link): Lead-Free Solder Wire
Flux: Soldering flux is a chemical compound that is used to clean, prepare, and improve the bonding of metals. It removes oxidation and contaminants from the surfaces to be joined and helps the melted solder flow.
- Here's a link for some soldering flux we use in our videos, available on Amazon (paid link): Kingbo Solder Flux
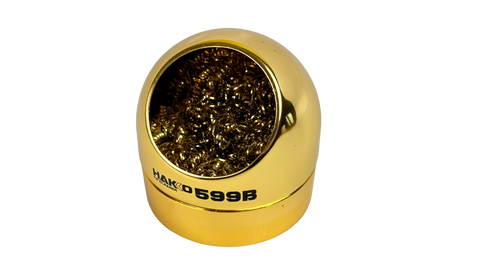
Sponge or Brass Wool: A damp sponge can be used to clean the tip of the soldering iron after each project to keep it fresh and help it to last longer. Brass wool can be used instead if there is an excess of solder buildup on the tip.
- Here's a handy soldering tip cleaner your can buy on Amazon (paid link): Hakko Soldering Tip Cleaner
Fume Extractor: As we mentioned before, working in a well ventilated space while soldering is important to keep yourself safe from potentially harmful fumes. A fume extractor will suck up and filter out those fumes to keep the air clean and safe.
- Here's a good fume extractor you can buy on Amazon (paid link): Hakko bench-top smoke absorber
Respirator Mask: Another way to protect yourself from fumes is by wearing a respirator mask.
- Here's a good respirator mask you can buy on Amazon (paid link): 3M reusable respirator mask
Wire Clippers: These can be used to cut solder wire down into segments, trim excess leads off of an electrical component after it has been soldered onto a PCB, etc.
- Here's a link to some wire clippers we like, available on Amazon (paid link): Hakko Micro Cutter
IPA: Isopropyl Alcohol (also known as IPA) is great for cleaning off electrical components as it dries quickly and doesn’t harm the components. It can also be used to clean up excess flux after soldering. Cotton or foam swabs are most commonly used to clean off components with IPA.
- Here's IPA you can find on Amazon (paid link): 99.9% Isopropyl Alcohol Electronics Cleaner
- Here's cotton swabs you can find on Amazon (paid link): Amazon Basics Cotton Swabs
- Here's foam swabs you can find on Amazon (paid link): Foam Cleaning Swab Sticks
Solder Wick: Solder wick is what you can use to remove excess solder from a project. You can also use a Solder Sucker, which is a more mechanical version of a solder wick.
- Here's solder wick you can find on Amazon (paid link): Desoldering Fine Braid Wick
- Here's a solder sucker you can find on Amazon (paid link): Solder Sucker
Helping Hands: This tool has adjustable arms and clips that help hold components and wires in place while soldering. It also has an LED lighted magnifying glass. It's optional, but can be very helpful.
- Here's a helping hand tool available on Amazon (paid link): KOTTO Third Hand Soldering Tool
Top 5 Beginner Soldering Tips
Before trying your hand at soldering for the first time, review these 5 tips and tricks:
- Tinning: Before each project, remember to pre-tin both the soldering iron tip and the component leads or pads before soldering. You can do this simply by adding a small amount of solder to the iron and the components. This helps with heat transfer and preserves the tip of your soldering iron so it will last longer.
- Dry solder joints: Dry solder joints occur when the solder doesn’t form a proper, strong bond between components. This can happen when there is inadequate heat, insufficient flux, or contaminants on the surfaces being soldered. To fix dry solder joints, reheat the joint with your soldering iron while adding a small amount of fresh solder and flux. Make sure that the joint is heated sufficiently for the new solder to melt and flow. This will create a smooth, shiny connection.
- Bridging: When you are soldering, make sure that you don’t join two components together on accident by too much solder. This is called bridging. You can easily fix this by using solder wick, or a solder sucker, to remove the excess solder that is connecting the two components. If you don’t fix the bridge it may cause bad electrical connections or shorted components.
- Practice and Patience: Soldering is a skill that improves with practice. You most likely won’t be able to do complex projects overnight. Start with simple projects and gradually work your way up to more complex ones. Be patient and learn from your mistakes.
- Cleanliness: Ensure that the surfaces you're soldering are clean and free of oxidation, grease, and contaminants. Use a soldering iron with a clean, tinned tip and apply flux to improve solder flow and adhesion. Keeping your workstation, components, and tools clean will make a big difference when working with solder.

Free TronicsFix Beginner Soldering Course
Make sure to check out this FREE TronicsFix Beginning Soldering Course where you get access to 7 in-depth training lessons created by Steve from TronicsFix. Plus confidence in learning how to solder and access to the TronicsFix Game Console Repair School community.
About the Author
 Kirstyn Bahnmiller is a writer, graphic designer, and video editor for TronicsFix who loves to share her ideas and creativity with the world. In her off time you will find her working on various crafts, making digital art, taking photos, and cooking delicious recipes she found online.