Nintendo Switch Not Charging?
We can all agree that one of the worst things is when you really want to to play a video game, but your console just isn’t working for whatever reason. It's so frustrating!
Thankfully, there are lots of resources online to help you get your console working again. Here at TronicsFix, fixing consoles is our specialty. In this blog post we’re going to tackle the most common issues regarding the Nintendo Switch charge port: why the console won’t charge at all, won’t charge on the dock, or will only charge intermittently. We will also mention some easy DIY fixes and some more advanced repairs for those who are brave enough. Let’s jump right in!

Possible Causes of Charging Issues
Unfortunately, there are a lot of things that can cause your Nintendo Switch to not charge. Here we will outline some less common causes as well as the most common causes.
Less Common Causes
- If you recently dropped your Switch it could’ve damaged the components inside.
- If your Switch was dropped in, or exposed to, water recently, it might’ve shorted the electrical components inside.
- If you modified or hacked your Switch, something might’ve gotten messed up in the process. You might need to undo the changes you made to your device.
- If there was a lightning strike nearby, the surge of electricity might’ve damaged your Switch if it was plugged into a wall outlet.
Most Common Causes
- The wall outlet that your Switch is plugged into might not be working correctly.
- If your Switch is plugged into a power strip, the power strip might be broken or faulty.
- The AC adapter (charging cord) for your Switch might be broken or faulty.
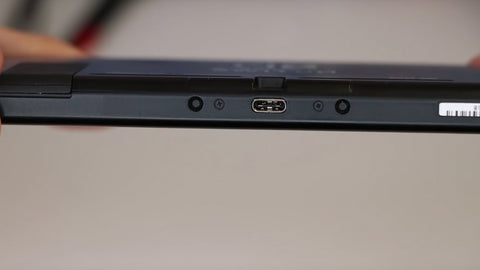
- If you are using a different charger that isn’t the official Nintendo Switch AC adapter (model No. HAC-002), it might be causing problems as it might not be compatible with the Switch or have the proper voltage for your device. Nintendo warns against using other chargers for the Switch for this reason.
- If you are using a portable battery pack to charge your Switch, you may have similar issues as your battery pack may not be compatible or have the proper voltage for your device.
- Your Nintendo Switch dock might be broken or faulty if you mainly charge your Switch inside of the dock.
- There might be internal damage to your Switch, like bent or broken pins inside of the charging port, damaged or faulty chips on the motherboard, or the battery itself might be dead.
Easy DIY Fixes To Try
Depending on what is the cause of your Switches charging issue the solution might be relatively easy or much more difficult. First, here are a few easy DIY fixes you can try on your own:
-
Check your wall outlet
If your Switch is plugged directly into the wall, the first thing you should check is whether your electrical outlet is working properly or not. You can easily check this by plugging something that you know works, like a lamp, into the outlet and see if it turns on. If it doesn’t, there might be something wrong with the outlet and you might need to contact an electrician to get it fixed. -
Check your power strip
On the other hand, if your Switch is plugged into a power strip, check to see if the power strip is working by plugging something else into it that you know works. You might need to replace the power strip if the working device doesn’t turn on. -
Reset the AC adapter
Like we mentioned before, Nintendo recommends using only the official Nintendo Switch AC adapter (model No. HAC-002) to charge your device. If you are using a different kind of charger, try using the official adapter instead. If that doesn’t fix the problem right away then you can try resetting the AC adapter.
To reset the AC adapter all you have to do is unplug it both from the wall (or power strip) and from the Switch, and leave it to sit on its own for at least 30 seconds. Keep in mind that this only works if both ends are completely unplugged. After 30 seconds, try plugging it back into the wall (or power strip) and your device.
If your Switch still isn’t charging after doing this step, you could try using a different AC adapter, or a new one, in case yours is damaged or broken. -
Hard reset your Nintendo Switch
Next, you can try hard resetting your Nintendo Switch. To do this, first unplug the AC adapter, then hold down the power button for 15-20 seconds, and let your device sit for a minute once it turns off. After about a minute has passed, plug the AC adapter back in, and try turning it on again to see if it will charge. -
Factory reset your Nintendo Switch
If nothing else works, you can try factory resetting your Switch as a last resort. This could fix any hardware issues you might be having. Just keep in mind that factory resetting your device will erase all of your games and save data - only proceed if you are okay with this. Follow these steps to reset your device:
- From the home menu, select System Settings (the gear symbol)
- Scroll down, and select System
- Scroll down to the bottom and select Formatting Options. You will need to enter a Parental Control PIN if it has been set for your device
- At the bottom you will see Initialize Console. Select this
- Carefully read through the information shown on the screen, then click Next if you are ready to continue
- Select Initialize and wait for the system to be erased
What If Those Didn't Work?
In some cases, the charge port itself may be broken. If you tried all of the above DIY fixes and nothing worked, or if you looked inside the charge port and saw bent or twisted pins, this might be the case.
Unfortunately, the fix for this won’t be as easy. You will need a soldering station and some soldering skills. If the word ‘soldering’ brings horror to your mind, you should think about sending your console in to have experts fix it for you. This is a much safer option because if you do something wrong while trying to replace the charge port you could seriously damage your console. (Skip down to the "Additional Help" section for repair service recommendations.)
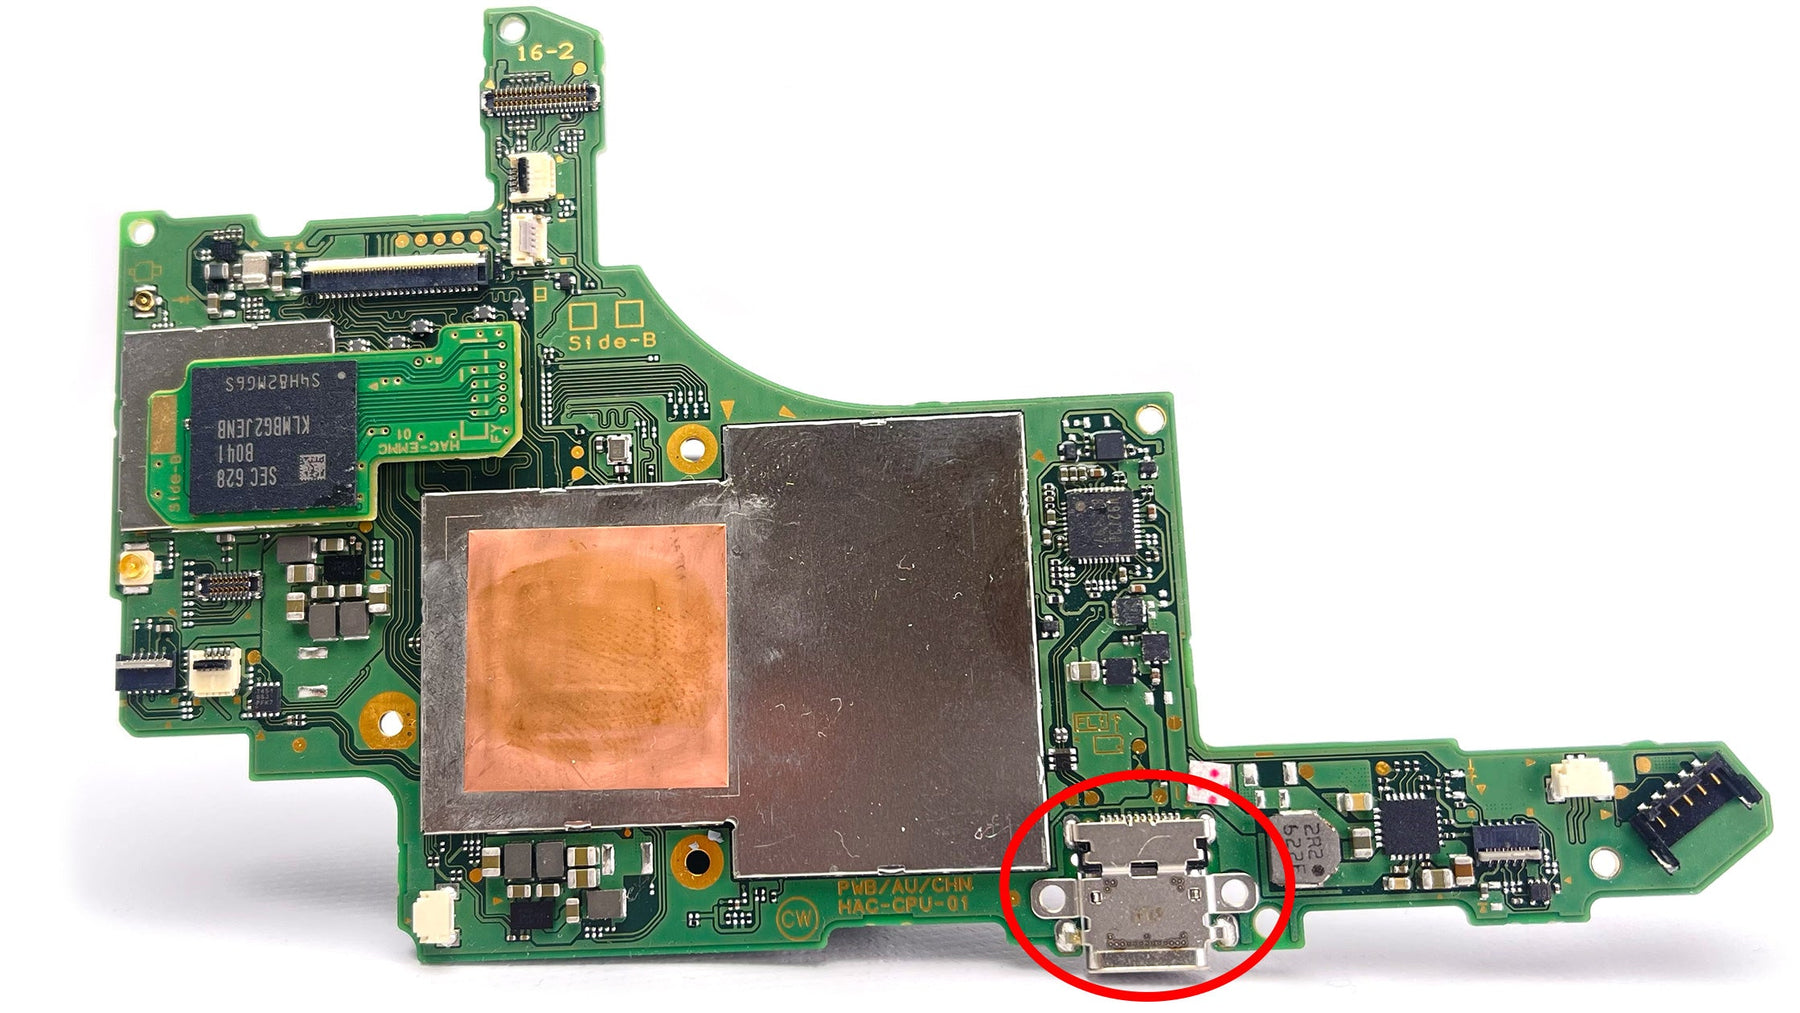
How to Replace a Nintendo Switch Charge Port
Here we will give a quick overview on how to replace your Nintendo Switch’s charge port for the adventurous few who aren’t afraid to do a little bit of soldering. If you want to see a more in-depth explanation on how to disassemble your Switch and replace the charge port, you can watch our TronicsFix YouTube video on Repairing a Switch that Won't Charge. Just keep in mind that this is a risky procedure, and if you aren’t comfortable doing it you should send your device in to get professionally fixed.
-
Disassemble the Switch
The first thing you’ll need to do is remove the back case of the Switch. To do this you will need a Y00 tri-wing screwdriver to remove the tiny screws holding the back case on. Make sure to put the screws in a safe place so they don’t get lost. Then, you will need to get to the motherboard, which is what the charge port is attached to. As mentioned, you can see more detailed instructions in the YouTube video linked above. Remove the motherboard, and then you can get a good look at the charge port.
-
Remove the old charge port
As we mentioned before, there is some soldering involved in this process. That is because the charge port is soldered onto the motherboard and must be removed with a hot air soldering tool. Soldering flux must also be added to the motherboard before each step. If you're looking for a good hot air soldering tool you can buy one on Amazon here (paid link): ATTEN Hot Air Soldering Station. And you can buy soldering flux too from Amazon (paid link): Kingbo Solder Flux.
With that in mind, place a generous amount of soldering flux on the connection points between the motherboard and the broken charge port, and carefully heat up the connection points with the hot air tool until you can gently pull it up. Be careful to not heat it too long, or else the motherboard might bubble from overheating. Once you have done this, set aside the broken charge port. -
Solder on the new charge port
To put the new charge port on, place some more soldering flux onto the pins on the motherboard, and slowly heat them up with the hot air tool. You want to do this until the solder on the pins has melted. Once the solder on the pins is melted, you can quickly attach the new charge port onto the pins. Make sure it is attached straight and that the connection points look good. -
Reassemble the Switch
Now that the new charge port is installed, you can put the motherboard back into your Nintendo Switch, as well as all the other components, and re-attach the back cover on the console. This process is very advanced. Only do it if you are confident in your own skills, or else you could seriously damage your console.
Additional Help
TronicsFix is no longer offering a repair service, but one of our repair techs started a business that we highly recommend. Check out the ShaneFix website for Nintendo Switch repairs, as well as other console repairs. There’s no need to buy a whole new Nintendo Switch when you can save some money and ShaneFix can fix it quick!
Another great source of information is the TronicsFix forum where you can find all sorts of posts about Nintendo Switches and solutions to problems.
About the Author
 Kirstyn Bahnmiller is a writer, graphic designer, and video editor for TronicsFix who loves to share her ideas and creativity with the world. In her off time you will find her working on various crafts, making digital art, taking photos, and cooking delicious recipes she found online.