How To Solder On Fan and Power Supply Connectors
When doing a DIY repair, it can be easy to accidentally do some damage even if you are very careful. The parts on a motherboard are especially delicate and can be broken easily, and this can be especially true for fan connectors and power supply connectors - which can break off if you pull on the connector the wrong way.
Thankfully, this kind of repair is possible to do at home! We don’t consider it an “easy” fix, since it requires both specific tools and prior experience, but if you have the tools and are confident in your soldering skills, you should be able to do this without too much difficulty. Here we will outline exactly what you need and what you need to do to get your connector working again.
Supplies and Equipment Needed for Connector Repair
For this kind of a project you will need quite a few supplies. Here is a list you can refer to (all links are Amazon paid links):
- Soldering Iron Kit
- Kester Solder Wire
- Kingbo Solder Flux
- Hakko Solder Wick
- Curable Solder Mask
- Precision Grinding Pen
- Metal Dental Pick
- Small Gauge Enameled Wire
- Metal Tweezers
- High Temperature Conformal Coating
- Digital Multimeter
- Cotton Swabs
- Isopropyl Alcohol
Also make sure to remember proper protective equipment! You will want to keep yourself safe when working with fumes and high temperatures. Here’s some PPE you will want to have (all links are Amazon paid links):
- Fume Extractor
- Fire Resistant Surface (to work on) like a Silicone Mat
Check Damage On Motherboard And Connector
Now that you have all of your supplies together, you will want to check and see how much damage has been done. First, take a good look at the connector to see if it’s still usable. Then check what needs to be fixed on the motherboard itself. Sometimes the connector is just fine, but it’s the motherboard that needs to be repaired, and sometimes it’s the other way around. Sometimes it’s both.

Second, use the multimeter to check and see if there is still continuity (if the two points can connect with an electrical current) between the pads and the circuit traces on the motherboard. Whatever damage you find, make sure to take note of it so you know what to work on in the next steps.
Prep Connector and Motherboard As Needed
There are just a few more things you need to do before you start soldering. Most importantly, if your connector is badly damaged, you might want to replace it. Also, if the pads on the board are broken, you might want to cut off the pieces that are no longer attached to the board, but make sure to leave the parts that are still attached. Lastly, if the pads are still stuck to the pins on the connector, you will want to remove them. After that, all you have to do is prep the motherboard for soldering.

To do this, you can use a precision grinder or a dental pick to carefully grind/scrape away the green solder mask from the broken pins. This is because you won’t be able to attach the solder in the next step if the solder mask is still on those areas. After you have finished removing the solder mask and can see the metal plating underneath, you will want to “tin” the pads on the motherboard as well as the pins on the connector. (Tinning is essentially putting a thin layer of solder into the surfaces to help the solder flow easier when attaching parts later on.) Once you have done these things, then you will be ready to go on to the next step.
Run Jumper Wires If Needed
When the connector breaks off of the motherboard, the pads on the motherboard and the pins on the connector no longer have a connection. To fix this, you will need to establish a new connection so that the connector will work properly when the device is turned on.
To do this you need to solder on some wires to re-make the connections. You will need to attach one end of the wire to the pad on the motherboard, and the other end of the wire on the corresponding pin on the connector. Once you have soldered the wire on, make sure that it is secure and can’t be moved out of place. Adding these wires will ensure that there will be an electrical connection between the motherboard and the connector again.
Note: If you need a refresher on soldering, check out our post on 5 Tips for Soldering Electronics

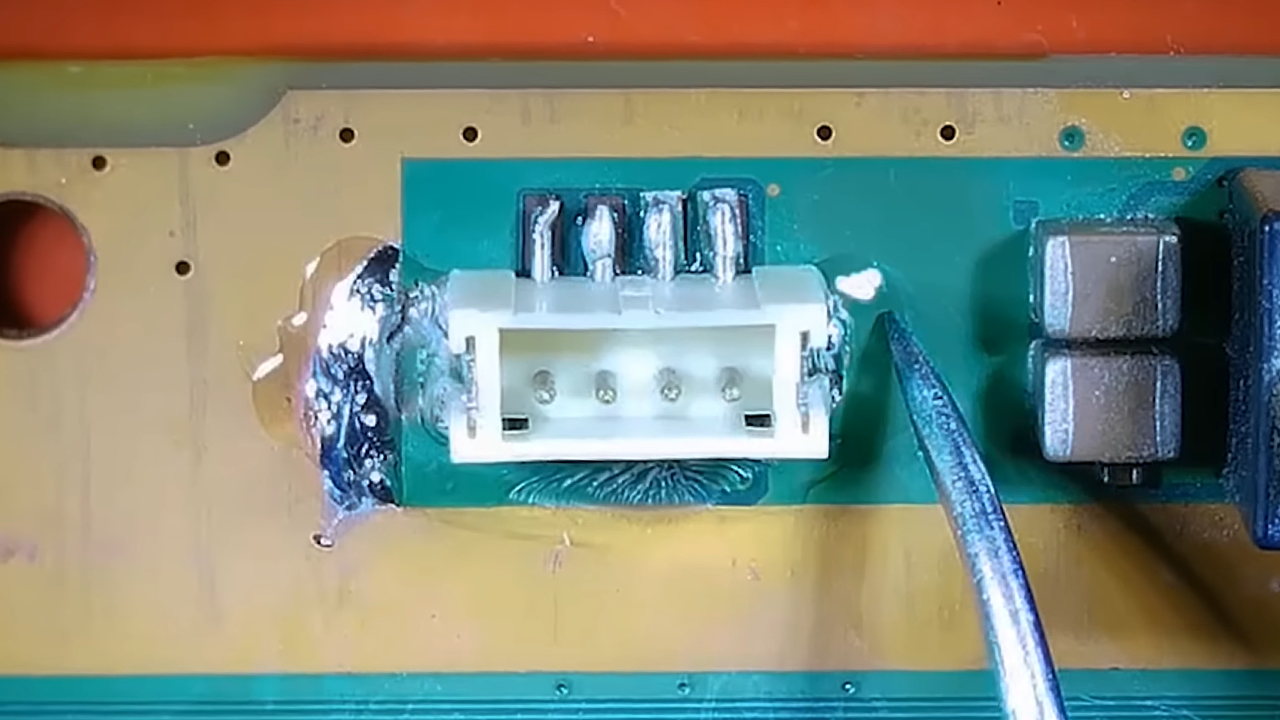
Solder The Connector Onto The Motherboard
To solder the connector itself back onto the motherboard, you will need to solder the mounting pins on either side of the connector to the motherboard. You will also need to solder the pins on the connector to the pins (or wires) on the motherboard.
Once you have soldered the connector back into place, and it feels secure on the board, then you are finished with soldering and can move on to the final step!

Finish Up Your DIY Repair
Here are a few extra steps you can take to make sure that the connection will be very secure and that it shouldn’t ever break off again. First, clean up any flux on the board/connector with a little bit of isopropyl alcohol on a cotton swab. (Note: If you skip this step then the products you use next won’t stick properly.) After cleaning up the flux, you can use epoxy, solder mask, or superglue to firmly attach the connector to the motherboard, as these are safe to use on printed circuit boards and electrical devices. After you have done this, your connector should be secure for a very long time.

Additional Help
Have you been wanting to learn how to solder, but don’t know where to start? Look no further! We have a FREE beginners soldering course on our Game Console Repair School website. On the website you can also find a paid beginner micro air soldering course, as well as a paid advanced micro air soldering course, for those who have some more soldering experience.
If you have any other questions, another a great resource for fixing electronics is our TronicsFix Forum, where people from all around the world who share a love for fixing put up questions and answers for various repair topics.
About the Author
 Kirstyn Bahnmiller is a writer, graphic designer, and video editor for TronicsFix who loves to share her ideas and creativity with the world. In her off time you will find her working on various crafts, making digital art, taking photos, and cooking delicious recipes she found online.