Xbox Series X HDMI Port Not Working
It is frustrating not to be able to figure out how to solve a no-signal message on your TV. One of the reasons you may be getting this message is that there is a problem with the HDMI Port on your Xbox. If your HDMI port is not working properly you won’t be able to connect with your TV. Luckily, we at TronicsFix can help you figure it out!
We will explain here easy solutions that could solve an HDMI port issue. If those don’t work, we will explain in detail how to replace your HDMI Port so you can get back to enjoying your video game console.

Symptoms of an HDMI Port Issue
Here are some examples of problems you may encounter if your HDMI port isn’t working correctly. You may experience one or more of these. Even if you don’t have these problems, it could help to double-check your HDMI port connection.
- Your TV screen is black
- Your Xbox Series X turns on, but the TV shows a “No Signal” error message
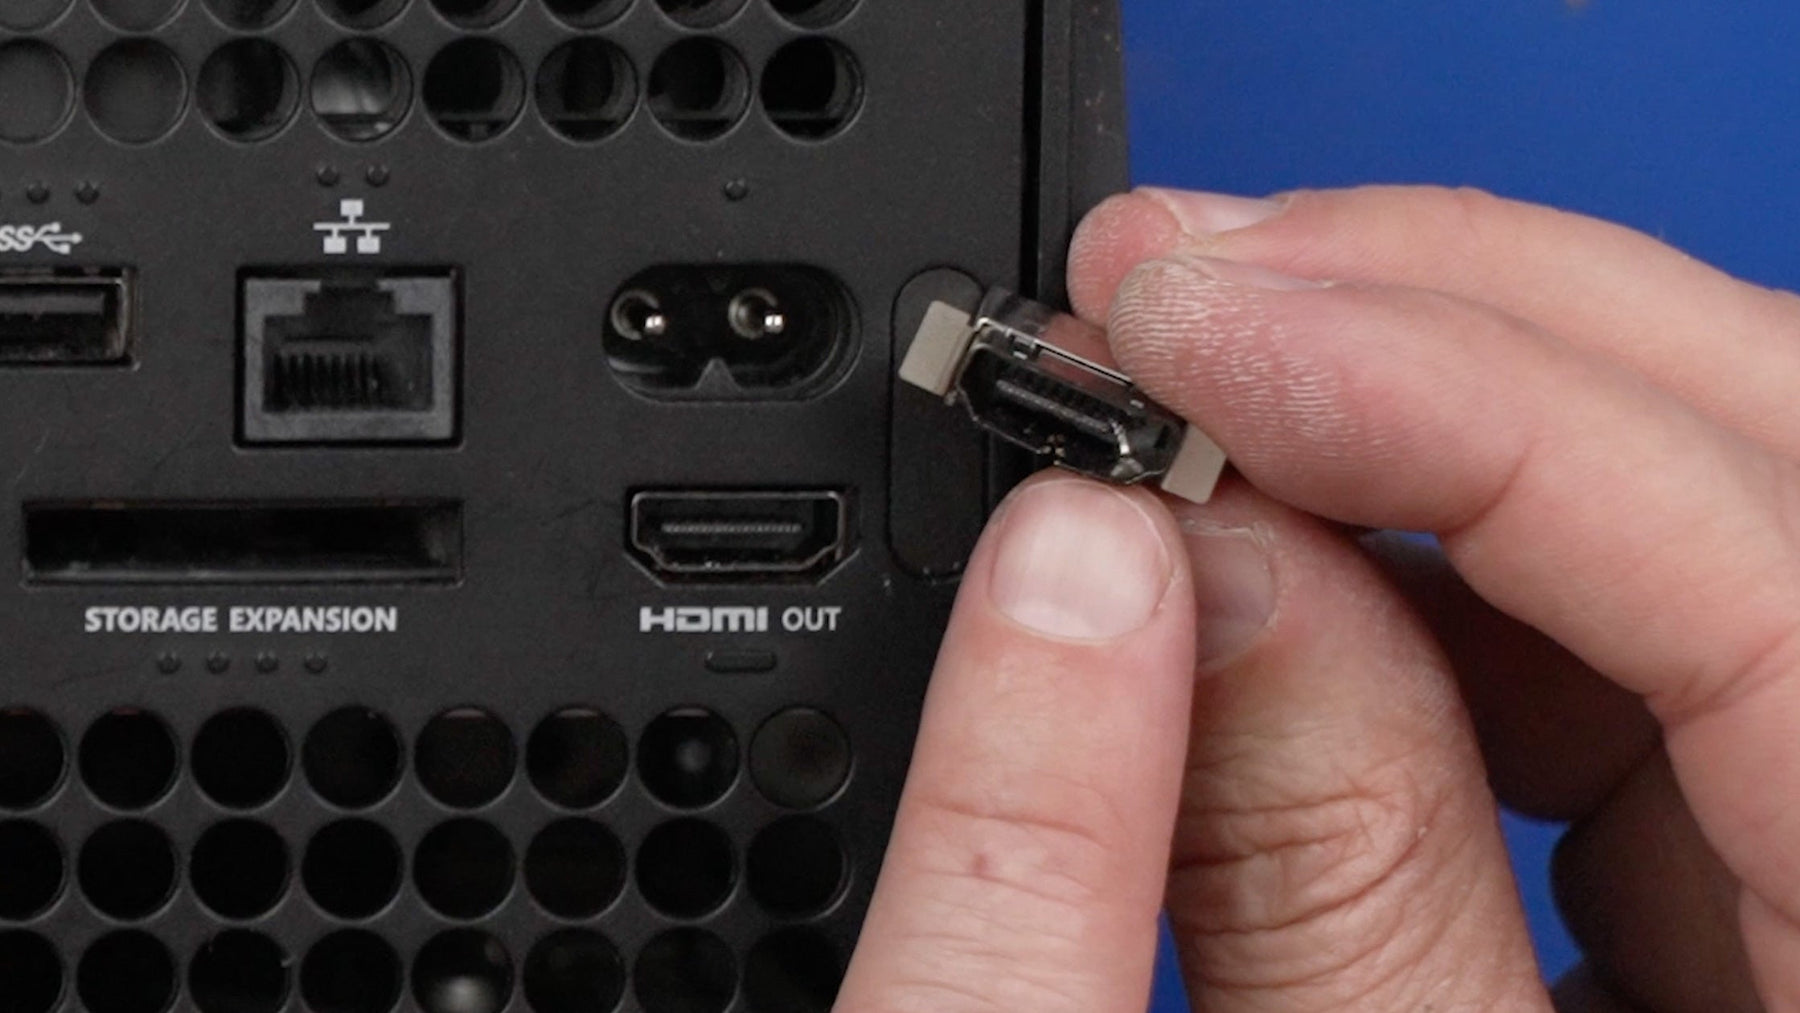
- HDMI Port looks bent or damaged
- HDMI cord won’t plug all the way in
- Your screen is pixelated or distorted
- Audio is distorted or sounds wrong
- HDMI cord is too loose or tight

Common Causes of the “No Signal” Message
There are a lot of reasons your HDMI port may not be working. It is important to figure out what the problem is so you can fix it in the future. You should first double-check that your TV and monitor are on and working. If they are working, then the problem is with the Xbox.
- There is a faulty connection due to a broken HDMI port or cord, which can occur when too much force is applied when plugging in the cord
- There was a glitch when the console powered up
- The wrong input source is selected on your TV
- Your TV uses a Variable Refresh Rate (VRR), which doesn’t work well with Xbox Series X
- There is some type of debris clogging the port
Simple DIY Fixes That Could Help
First, you should check that both the TV and the Xbox consoles are powered on, and the correct input source is selected. Once you have double-checked that, you can try the solutions listed below.
1. Faulty Connection
There are multiple reasons why the console may not be connecting with the TV. It is best to verify that you have the right cord and that it is plugged correctly into both the Xbox console and the TV. Next, you should try a different HDMI cord in case the one you are using is broken. If the HDMI cord is plugged correctly into the Xbox console, you can try plugging the HDMI cord into a different HDMI port on the TV. You will need to change the input source selected to the new HDMI port. Another thing to try is cleaning the HDMI ports on the Xbox and TV to make sure nothing is interfering with the connection. You can clean the cables and ports with isopropyl alcohol and a cotton swab.
2. Power Cycle the Xbox Console and TV
As with all electronics, the best thing to do when something goes wrong is to turn everything off and then on again. There may have been a glitch that caused the Xbox to not connect right to the TV. Power cycling can fix the issue.
Xbox:
- Hold the Xbox button down until the LED lights turn off
- Unplug the Xbox from its power source
- While the Xbox is unplugged, hold the Xbox button down again for 10 seconds to drain its charge
TV:
- Unplug the TV from its power source
- Hold the TV button down for 10 seconds to drain its charge
- Plug the TV back in and turn it on
The last step is to connect your Xbox console to the TV and turn it on. Fingers crossed, that solves the problem. Don’t worry if it doesn’t because there are more things you can try.
3. Activate Low-Resolution Mode
The Xbox Series X can’t handle 4k@120Hz at the same time as VRR. You can start by configuring your Xbox to anything other than 4k@120Hz.
- Open Settings > General > TV & Display Options > Video Modes
- Change the resolution
If you can’t see anything on your screen, you can activate low-resolution mode manually on your Xbox.
- Eject any discs you have in the console.
- Press the power button for 10 seconds to turn off the console.
- Hold the power and eject buttons for 20 seconds until you hear two beeps. Make you keep holding the buttons after the first beep until you hear the second, which will be about 10 seconds later.
- Now that the console is in low-resolution mode, you can try turning on the TV and changing the resolution. Follow the steps listed above.
4. Configure VRR on TV
The Xbox Series X doesn’t work well if your TV supports VRR. If you have VRR on your TV, it may cause an error message. The good news is that you can disable VRR on your TV. You should look up how to change VRR on your specific TV brand. The steps may vary depending on what type of TV you are using.
DIY Repairs vs. Professional Repairs
Repairing the HDMI port is the last resort option. Make sure you have tried everything else before you try to replace your port. We don’t recommend doing this yourself unless you have experience and the right equipment. If your warranty is still valid, you can find a Microsoft service center to fix your console for free. Another option is to use a professional like ShaneFix.com to repair your HDMI port.
This repair requires more advanced knowledge of soldering and circuit boards. If you are not sure about what you are doing you could cause more harm than good. If you think you are ready for this, continue reading to learn basic steps and what tools are required for this repair.
How to Replace Your HDMI Port
Tools and Parts You'll Need:
This is a basic list of the tools required for this project and our recommendations if you don’t already have everything you need.
- The first thing you need to do is check the outside of your Xbox for the model number. You can order the correct port from either eBay or Amazon.
- It is always helpful to have a toolkit (like this iFixit Pro Tech Toolkit (Amazon paid link)) to provide you with the necessary tools to disassemble and move parts on electronics.
- Solder flux reduces the surface tension which helps the solder flow. That will help you remove parts easier and keep the joint clean by removing oxides. (Solder flux is available on Amazon (paid link): Kingbo Solder Flux.)
- We recommend this ATTEN Hot Air Soldering Station (Amazon paid link) if you are looking for one. It can be used to remove old solder and for resoldering on circuit boards.
Steps to Replace HDMI Port:
Here are some of the steps you should take if you want to try and fix your HDMI Port yourself. Follow along with our Youtube video where I replace an Xbox Series X HDMI port!
- Disassemble the Xbox console down to its circuit board. We also recommend removing the heatsink.
- Add solder flux to the four grounded legs of the port and to each of the pins.

- Use a pair of needle nose pliers and a hot air rework station to heat up the area on the back of the circuit board that is opposite the HDMI port. When the solder melts the port will fall off. Don’t pull the port away because you could easily end up ripping the pads off.
RECOMMENDED HEAT SETTINGS: 500c and 80% Air Flow For Quick 861DW
- You need to make sure your new HDMI port is tinned. Tinning is when you add a uniform coat of solder on the two surfaces you plan to connect. To do this, place your new HDMI port in an electronics vise or just on a flat surface with a mat like this gasare soldering mat (Amazon paid link) and add solder to each pin on the HDMI port. You will want to make sure you don’t bend the pins or bridge the pins because that will cause your port to not work.
- Heat up the circuit board the same way you did in Step 5. When the solder is melted, slowly insert the new tinned HDMI port. Apply a small amount of pressure on top of the port to make sure that it doesn’t move around.
- Solder all 19 pins with fresh solder, then use a tool to check that each pin is soldered on securely.. Double-check that there are no bridges because they will stop the HDMI port from displaying.

- Clean off the area surrounding the HDMI port. Make sure there is no more solder flux remaining.
- Reassemble the console and test to see if it works!
Additional Help
If you need more help, we highly recommend checking out Shanefix.com. They offer repair services to many types of consoles. We don’t want you to have to buy a new console unless you have to!
Another great resource is the TronicsFix forum, which allows you to interact with a community of video gamers. They can offer advice on how to fix your specific problem.
About the Author
 Jocelyn Seaton is a writer for TronicsFix who enjoys helping others learn new things. In her off time you will find her reading and spending time with her family.