How to Manually Eject a Disc From a PS4
Getting a disc stuck in your gaming console can be a very inconvenient and stressful event. What are you supposed to do if you can’t get a disc out of your PS4? Will you have to send in your console for repair and spend a bunch of money?
Thankfully, manually ejecting a disc on a PS4 is usually fairly easy. Sometimes the disc drive itself is broken, but most of the time you can get it out yourself without having to send it in for repair. Each console is slightly different when it comes to accessing the manual eject screw though, so we will outline the differences here. Check the model number on your PS4 to make sure which version you have, and follow the instructions for that version.
Important side note: After ejecting a disc manually, always try to use a different disc to see if it will work properly. If it does, try using the other disc again.

PS4 CUH-1000, CUH-1110 Manual Eject Instructions
- Turn off your console, unplug all cords from the console, and lay it flat on a surface you can safely work on.
- Orient the console so that the PS4 logo is upright and facing you.
- Press down on the top-left panel and carefully slide the panel off.
- On the left you will see some vents. The eject screw is a little difficult to see right off the bat, so you may need to shine a flashlight down into the vents to see where it is. Here is the general area you will want to look for, and a close up with a light shone into the vents:


- Using a long Phillips head screwdriver, rotate the eject screw counter-clockwise until you see the disc coming out. Once it is out enough, you can gently pull on it to take it out all the way.
- Once you are finished, put the top panel back on, and plug in your console to turn it back on again.
PS4 CUH-1200 Manual Eject Instructions
- Turn off your console, unplug all cords from the console, and lay it flat on a surface you can safely work on.
- Orient the console so that the PS4 logo is upright and facing you.
- Press down on the top-left panel and carefully slide the panel off.
- You will first need to remove the hard drive to be able to access the manual eject screw. To do this, locate the screw that is keeping the hard drive in place, which looks like this:

Using a Phillips screwdriver, remove the screw holding down the hard drive, and then slide out the hard drive about half way. The hole that goes to the manual eject screw is at the top so you don’t have to take it out all the way. - Next, find the hole where the manual eject screw is. It will have arrows around it and will look like this:

Using the Phillips head screwdriver, rotate the eject screw clockwise until you see the disc coming out. Keep in mind that this might take a while. Once it is out enough, you can gently pull on it to take it out all the way. - Once you are finished, push the hard drive back in all the way, put the screw back in that holds it down, replace the top-left panel, and you’ll be ready to plug your PS4 back in and turn it back on again.
PS4 CUH-7010, CUH-2015 Manual Eject Instructions
- Turn off your console, unplug all cords from the console, and lay it flat on a surface you can safely work on.
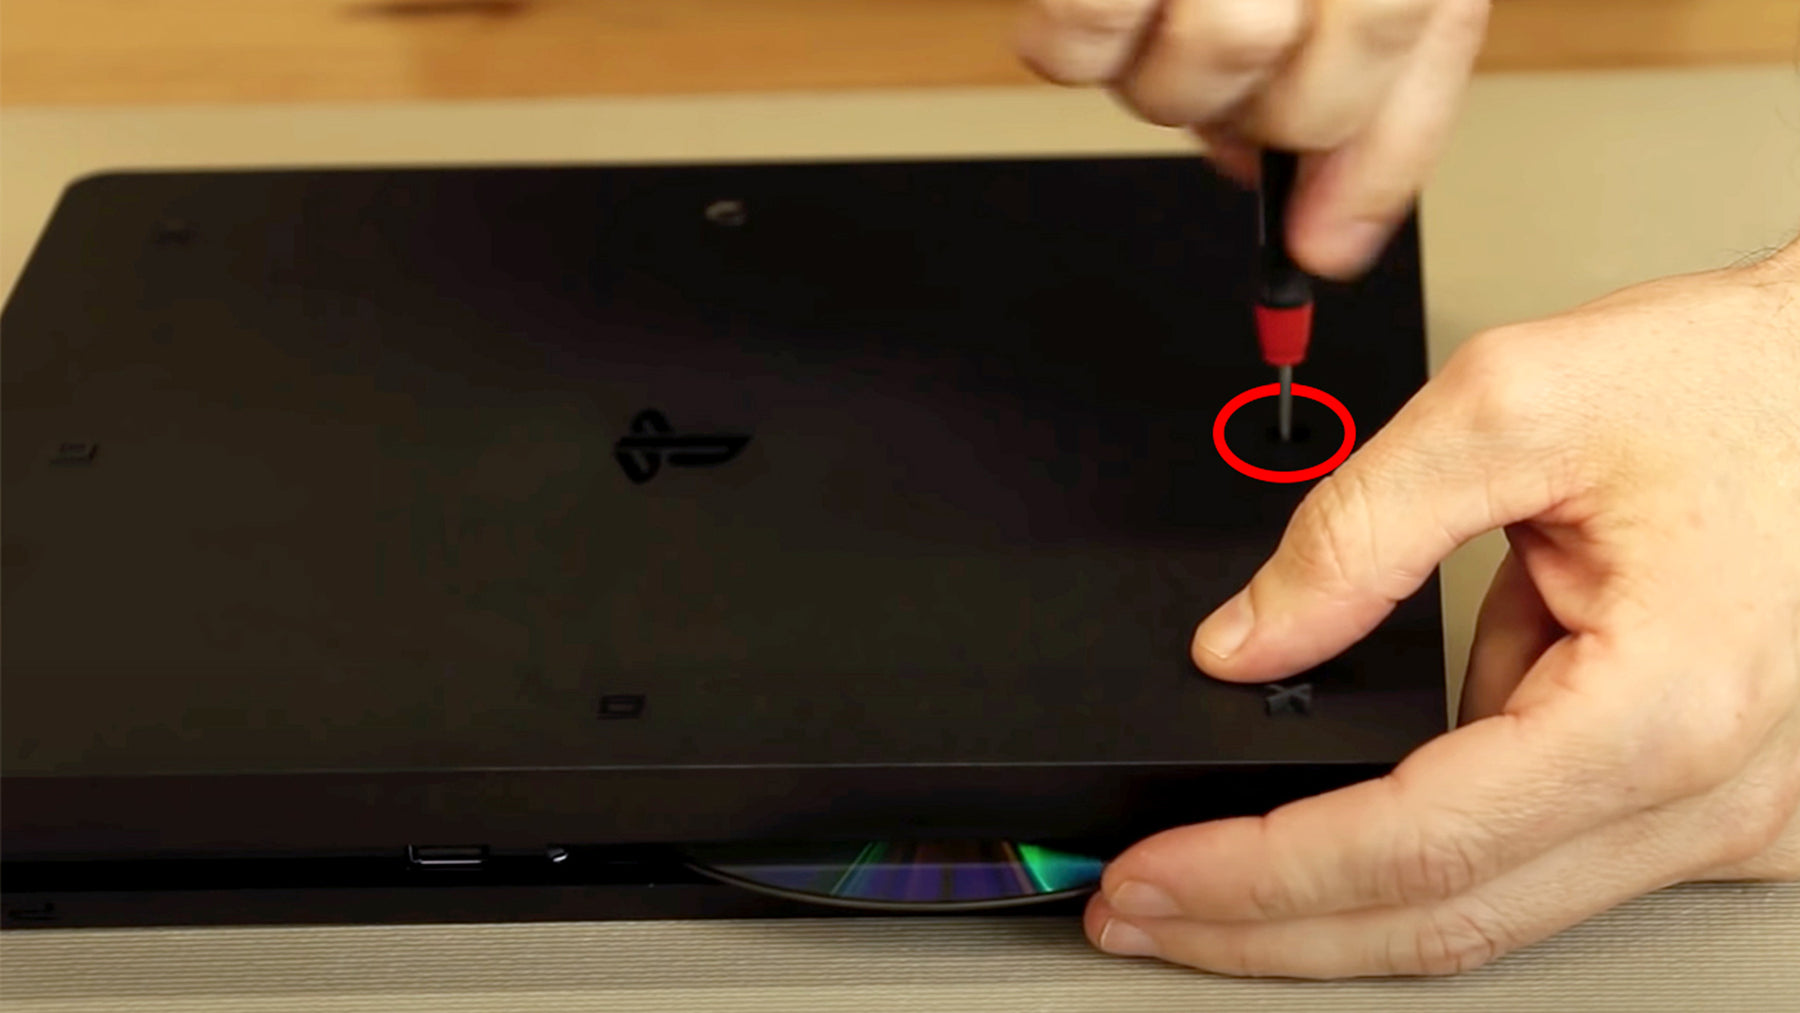
- Flip the console upside down and orient it so that the PS4 logo is facing away from you. The circular hole closest to you is where the manual eject screw is located. This is what that will look like:


Remove the small cap covering the hole, and then you will be ready to eject the disc. - Using a Phillips head screwdriver, rotate the eject screw counter-clockwise until you see the disc coming out. Once it is out enough, you can gently pull on it to take it out all the way.
- Once you are finished, just replace the small cap onto the hole, and you’ll be ready to plug in your console and turn it on again.
Videos to Watch
If you would rather follow along to a video tutorial, here are some helpful videos you can watch that are on our TronicsFix YouTube channel:
Additional Help
TronicsFix is no longer offering console repair services, but one of our old repair techs started a business called ShaneFix that we highly recommend. Through his website you can request help for all sorts of repairs, including PlayStation 4 Original, Slim and Pro repairs. There’s no need to buy a whole new PS4 when you can save some money and ShaneFix can fix your broken console, quick!
We also recommend checking out the TronicsFix forum where you can find lots of posts about PlayStation 4’s and solutions to problems written by the TronicsFix community.
About the Author
 Kirstyn Bahnmiller is a writer, graphic designer, and video editor for TronicsFix who loves to share her ideas and creativity with the world. In her off time you will find her working on various crafts, making digital art, taking photos, and cooking delicious recipes she found online.